The complete guide to wireless setup of your canon printer Call+1-888-621-0339(Toll free)
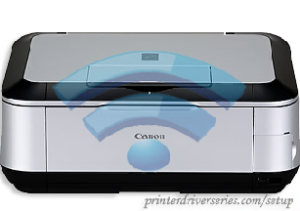
To set up a wireless Canon printer, you can usually use two methods viz-a-viz the Standard Connection Method and a WPS Connection Method. Below is a list of descriptive steps to both the methods. Yet if you are unable to install it, you can always rely on Canon Printer Tech Support for a detailed and swift solution to your problem.
STANDARD CONNECTION METHOD:
- For Windows users, run the setup from the installation CD that came along with your printer (If you do not have the installation CD or if you are a Mac user, you can download the software from the Canon Homepage under your printers’ range.
- Select Next for the basic steps to execute the software up to a point where you have to select between a USB or Wireless connection, select the latter.
- During this step make sure that your printer is turned on and that the power light is blinking and then click next.
- A screen appears where you can select ‘Connect to the Network’ and then ‘Cableless Setup’. (This option of cableless setup is not available to Windows XP users)
- When the Connection via Cableless Setup appears press continuously the printer’s Wi-Fi button until the orange light blinks twice and then release it after the second blink.
- Make sure that the blue Wi-Fi light blinks immediately and the main power (green)light is also on.
- Click Next.
- Further screens will appear asking you to input your location(region and exact location). Select those and click Next.
-
A pop –up list will appear now asking you to select the software that you want to install. Click on the requisite software and click Next.
- Finally, you will have to approve by clicking ‘Yes’ on the user license agreement following which click ‘Complete’ and your process of setting up a wireless connection of your Canon printer concludes, but only for Windows users.
- For Mac users, under the Setup section click on ‘Add Printer’ and select the Canon IJ Network driver version and click ‘ADD’.
- If the name of your printer appears, click ‘Next’ and the process concludes. If not you can look out for other drivers as required by your printer. Then click ‘Next’ and conclude it.
- For those whose printers were not detected, you can proceed with the USB cable step. This step is generally for Windows XP users and also for devices undetected users.
- Select the ‘setup network connection vis USB’ under Setup section and then click ‘Next’.
- Now connect your printer to the computer using the USB cable option.
- This will detect your printer and the name of your router or hub connected to the computer will be displayed and if that is the name of your wireless connection then click ‘Yes’.
- In the next appearing screen click ‘Complete’ which concludes your Canon printer setup using a USB Cable.
WPS CONNECTION METHOD:
By far Wi-Fi Protected Setup or WPS method is considered to be the easiest and hassle-free method to set up a wireless connection to your Canon printer. But in order to avail this feature, you will have to ensure that your router or hub has the provision of a WPS connection. It also has to allow your printer to access a faster connection to the network without entering a password.
- First turn the printer ON.
- Press continuously the Wi-Fi button on your printer so that the alarm light blinks once.
- Then see to it that the light next to it is blinking blue and then go to your router and press the WPS button immediately.
- Both the power and Wi-Fi light will blink continuously while searching for the access point of your router and once connected the lights will stop blinking and will remain continuously lit.
- If you wish to further ensure that your printer is connected to the proper access point you can take out a print of the page displaying your network settings.
- For this make sure that the printer is turned on and load a compatible sheet in the input tray and then press the Cancel/Resume button until the alarm lamp blinks about 15 times.
- This will print the network information, wherein check the ‘Connection’ to be ‘Active’ and the SSID displays the name of your router connection.
- Thus you can complete the setup procedure of your Canon Printer through WPS.

Canon Printer Tech Support
For a more detailed explanation regarding the setup, feel free to contact Canon Printer Tech Support at +1-888-621-0339. Canon Printer Tech Support is a 24×7 toll-free service where you can also enjoy their monthly or yearly subscription at a minimal cost. You can enjoy the service of Canon Printer Tech Support without having to take your printer anywhere. During the tenure of which you can avail to the entitlements free of cost. You can also enjoy an extra feature of the money return policy if you are not happy with the service.
Troubleshoot the error code 006 in Canon Printer
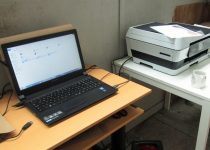
A Guide to Install & Uninstall Canon Printer To Your Computer